-40%
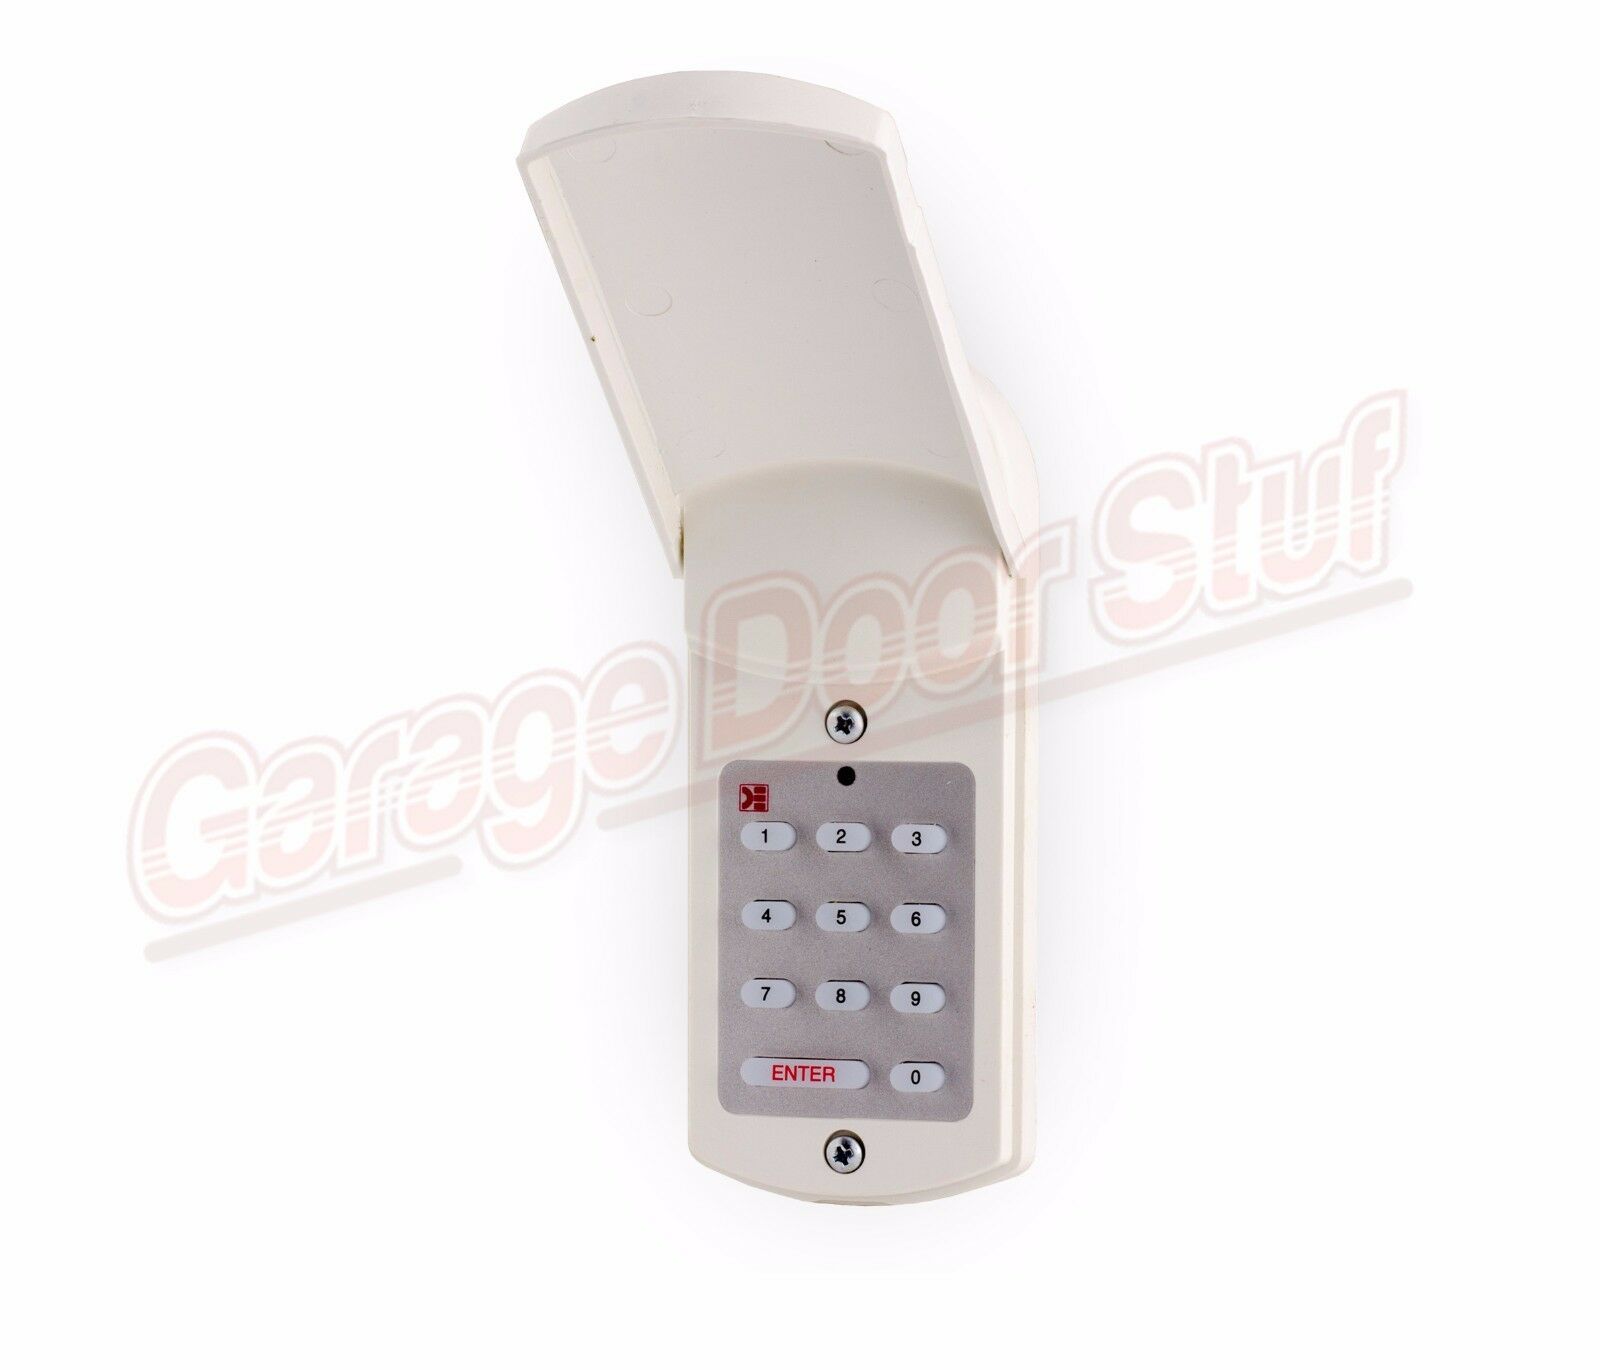
Domino GD-1 Wired Keyless Entry Garage Door Keypad GD1
$ 21.11
- Description
- Size Guide
Description
Domino GD-1 Wired Keyless Entry Garage Door Keypad GD1Domino GD-1 Wired Keyless Entry Garage Door Keypad GD1
WORKS ON ALL GARAGE DOOR OPENERS
NEW IN BOX
DOMINO ENGINEERING KEYLESS ENTRY SYSTEM
Complete system, instructions included
Works on ALL Garage Door Openers
This is a wired system that is VERY easy to install and program
The DOMINO GARAGE DOOR KEYPAD is a simple and convenient way to open and close garage doors.
Consisting of an outside mounted keypad and inside control box, the DOMINO GARAGE DOOR KEYPAD features personalized code setting, making the system as easy to program as it is to install.
• Universal Use Compatible with all garage door openers.
• Easy Programming Keypad is quickly programmed in three simple steps.
• Code Security Keypad shuts off for one minute after five wrong entries have been pressed.
• Protective Cover Flip-Up cover design protects the unit against the elements.
• Personalized User Code A 1 through 6 digit code may be chosen, over 1,000,000 possibilities.
• Back Lighting lighted keypad for easy nighttime operation. Additional indicator light provides verification as keys are pressed.
• Low Power Warning / Battery Saver Lights dim to indicate batteries should be replaced soon. Special sleep circuitry conserves battery life.
• Instant Stop After code is entered and garage door opener is activated, the “enter” key may be pressed again to stop or reverse the door, without re-entering the code. The “enter” key remains active for 20 seconds.
• Additional Push Button conveniently located on control box.
Installation:
1. Outside
Choose a convenient location to mount the keypad. Drill a ½” (or larger) hole from outside to inside the garage. Carefully, feed cable from keypad to inside of garage. Screw keypad to outside surface with 2 screws (included). DO NOT OVER TIGHTEN. The keypad is meant to “stand off” the surface so moisture can run behind the unit.
2. Inside
a. Disconnect power to garage door opener.
b. Connect control box to push button terminals on opener with two low voltage (18-24 gauge) wires. [OPTIONAL: If there is a nearby wall push button already wired to your garage opener, you can connect the control box to the terminals of this wall push button. ]
c. Strip ¼” insulation from connecting wires, insert and screw wires into the two terminals marked “OPENER” in control box. There is no polarity on the connecting wires. Either wire in either terminal is OK
d. Insert 3 “AA” alkaline batteries (included), observing polarity.
e. Snap keypad cable plug, with locking tab on bottom, into receptacle marked “KEYPAD” in control box.
f. Mount control box to wall with styrofoam over batteries. Styrofoam keeps batteries from vibrating out of position.
g. Reconnect power to garage door opener.
How to program your Keypad:
Step 1. Slide switch to “program” or “on” – (switch is located on control box)
Step 2. Press “ENTER”
Step 3. Press your code numbers (you can use up to six digit in your code)
Step 4. Press “ENTER”
Step 5. Slide switch to “operate” or “off”
To use your keypad, just enter your code numbers and press "Enter"
That is it! Very easy to program and to re program, install a one time usage # with ease.
CAUTION:
Repairing a garage door is a dangerous task. Garage door springs are under extreme tension and require appropriate safety precautions. Realize and understand the risks before undertaking any repair. Your health and safety is the #1 concern. No amount of financial savings is worth jeopardizing your health. Working on or around garage doors and openers could result in property damage, personal injury or death. While all efforts are made to provide accurate information and guidance, it is impossible to predict all repair circumstances. Accordingly, the user agrees that use of all products and information contained herein are at your own risk. In no event shall GARAGE DOOR STUFF or Unique Supply & Repair be liable for any property damage, personal injury/death, or any other loss or damage that may result from your use of the information and products provided on this site. All information contained within this site is provided “as-is” without warranty expressed or implied. User assumes all responsibility/risk for use of information and products purchased.


